
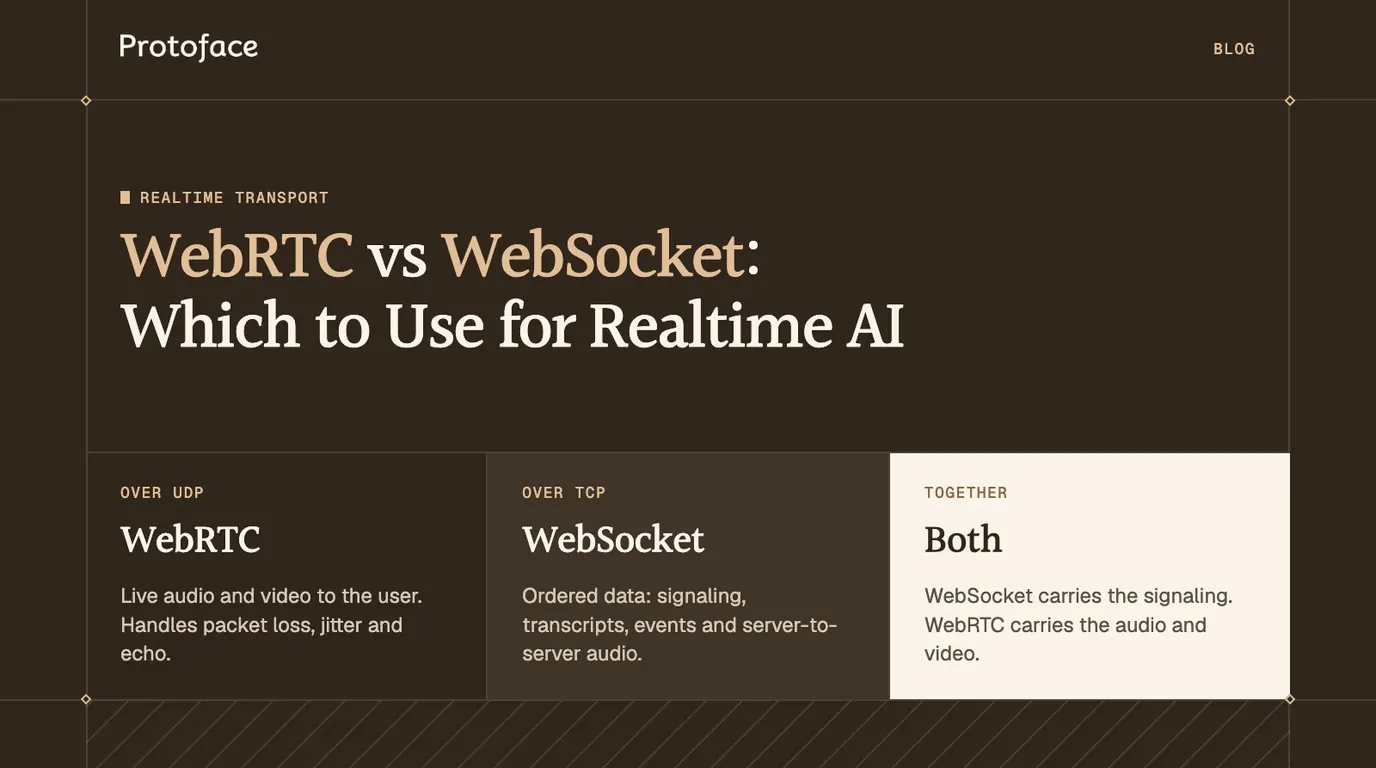
WebRTC vs WebSocket comes down to what you are sending. Use WebRTC for live audio and video between a user's device and your agent: it runs over UDP and handles packet loss, jitter and echo for you. Use WebSocket for ordered data over TCP: signaling, transcripts, events and server-to-server audio.
WebRTC vs WebSocket: the short answer
WebRTC is a media stack. It carries encrypted audio and video over UDP, drops what arrives too late and keeps playing. WebSocket is a message pipe. It carries ordered text or binary frames over one TCP connection and never drops anything. A voice agent or avatar usually needs both: WebRTC on the hop that touches the user, WebSocket everywhere else.
What you are building | Use | Why |
|---|---|---|
Voice agent in a browser or mobile app | WebRTC | Microphone and speaker on a network you do not control |
Talking avatar with lip sync | WebRTC | Audio and video share one clock, so the mouth stays on the words |
Audio between your server and an STT, TTS or speech model API | WebSocket | Data-center links lose few packets and need no NAT traversal |
Phone audio handed to you by a telephony provider | WebSocket | The provider sets the format, and the link is server to server |
Transcripts, tool calls, UI state, session events | WebSocket | Every message must arrive, in order |
A production browser app with a live agent | Both | WebSocket sets up and controls the call, WebRTC carries it |
The other peer in a realtime AI call is a server, not a second person, so peer-to-peer WebRTC is rarely what you run. The browser connects to a media server, and your agent connects to the same server as another participant. The article on WebRTC SFU, P2P and MCU architectures covers that choice.
How WebRTC and WebSocket differ
They sit at different layers. WebSocket is a transport for bytes. WebRTC is a transport plus codecs, timing, encryption and network adaptation for media.
Property | WebRTC | WebSocket |
|---|---|---|
Transport | RTP over UDP by default, TCP or TLS relay as fallback | One TCP connection, usually inside TLS |
Connection setup | Offer, answer and ICE candidates exchanged over a channel you provide | One HTTP Upgrade request |
Media handling | Codecs, jitter buffer, audio and video sync, bitrate adaptation built in | None. You send bytes and build the rest |
Lost packets | Concealed, corrected or skipped so playback continues | Retransmitted. Everything behind them waits |
Encryption | Always on | On when you use |
NAT and firewalls | Needs ICE, STUN and sometimes TURN | Works wherever HTTPS works |
Browser support | All current major browsers | All current major browsers |
Transport. RFC 6455 defines WebSocket as an independent TCP-based protocol whose handshake is an HTTP Upgrade request, on port 80 or on port 443 under TLS. WebRTC media is RTP, normally sent over UDP.
Connection setup. A WebSocket opens with one request. A WebRTC connection needs both sides to trade a session description and network candidates before any media flows, and the standard leaves that exchange to you.
Media handling. RFC 7874 requires every WebRTC endpoint to implement the Opus and G.711 audio codecs, so two endpoints always share a codec. A WebSocket has no idea its payload is audio.
Reliability. TCP guarantees order and delivery. RFC 8834 gives WebRTC the opposite toolkit: RTCP feedback, optional retransmission, forward error correction and mandatory congestion control, all tuned to keep media on time instead of complete.
Encryption. RFC 8834 also forbids unencrypted RTP: endpoints must use the secure profile for every packet. A WebSocket is encrypted only if you serve it over TLS.
Latency: what each transport adds
On a clean link the two are close. The gap opens when packets are lost: TCP holds back everything behind the missing segment until it is resent, and WebRTC plays on. Wi-Fi and mobile networks lose packets routinely, which is why the user-facing hop decides the choice.
Head-of-line blocking on a WebSocket
Voice is sent in small frames, typically 20 milliseconds each. When one TCP segment is lost, the receiver's operating system keeps every later frame in its buffer until the retransmission lands. Your code sees silence, then a burst. A deeper playback buffer hides the burst, but every frame of every call then pays that delay.
A WebSocket also has no way to drop stale audio. If the sender produces faster than the network delivers, frames queue. Watch bufferedAmount on the sending socket; a number that keeps growing is latency accumulating.
Loss handling in WebRTC
WebRTC treats a late packet as a lost packet. The jitter buffer holds just enough audio to absorb variation in arrival time and resizes itself as the network changes. A missing audio frame is concealed by the decoder, and a missing video frame can be requested again or skipped. Congestion control lowers the bitrate before queues build.
One caveat: when a network blocks UDP and the call falls back to a TURN relay over TCP or TLS, WebRTC inherits TCP's blocking on that leg.
Is WebRTC faster than WebSocket for audio?
Not on a good network. Over a short, low-loss path, such as two services in one cloud region, raw audio on a WebSocket arrives about as fast as RTP would. WebRTC wins on the paths you do not control, because its delay stays bounded when packets drop.
Measure it on your own call
No vendor's number will match your network, model and region, so read the figures from a live session. The browser reports them through getStats(). MDN documents the inbound RTP statistics, including jitter buffer delay and packets lost.
The function prints the average time audio waits in the jitter buffer and the network round trip on the active candidate pair. Both jitter buffer fields are running totals, so subtract the previous sample for a per-interval value. Run it on office Wi-Fi, then on a throttled mobile profile. The article on measuring and reducing WebRTC latency walks through the full budget from microphone to first avatar frame.
Audio and video handling
WebRTC gives you a working call the moment tracks are attached. Over a WebSocket you receive bytes and write the audio engine yourself.
What WebRTC does for you
Codecs. Opus for audio and a negotiated video codec, with encoder settings that follow the available bitrate.
Jitter buffer and sync. RTP timestamps let the receiver play audio at a steady pace and line video up with it. For an avatar, that shared timeline is what keeps the lips on the words.
Echo cancellation. RFC 7874 says a WebRTC endpoint should include echo control, and browsers ship echo cancellation, noise suppression and gain control for microphone tracks. Leave them on, and the agent does not hear its own voice from the user's speakers and interrupt itself. See how WebRTC echo cancellation works and where it fails.
Bandwidth adaptation. The sender lowers bitrate or resolution when the path narrows. With a media server you can add simulcast for per-viewer bandwidth adaptation.
What you build by hand over a WebSocket
Sending raw PCM chunks over a socket means writing the playback scheduler yourself. A minimal browser version queues each chunk right after the previous one:
The code converts 16-bit mono PCM to floats and schedules it with a fixed 50 millisecond margin. That margin is a jitter buffer with one setting. It does not adapt, conceal gaps or resync after a stall. You still have to cancel queued audio the instant the user interrupts and capture microphone audio upstream. Uncompressed PCM also costs far more bandwidth than Opus, and video on the same socket competes with the audio for one ordered stream.
Voice activity detection behaves differently on each path. A WebRTC track arrives as a steady, echo-canceled stream, so turn detection sees clean timing. Socket audio arrives in whatever rhythm TCP allows, so a stall can look like the end of a sentence.
NAT traversal, STUN and TURN
WebRTC has to find a UDP path between two endpoints that may both sit behind NATs, and that takes ICE plus servers you run or rent. A WebSocket is one outbound TLS connection on port 443, which passes almost any firewall or proxy.
MDN's WebRTC protocols reference describes the parts. ICE is the framework that tests candidate paths. A STUN server tells a client its public address. A TURN server relays all media when no direct path works, and MDN notes that this comes with overhead, so it is used only when there are no alternatives.
Setup time. Candidate gathering and connectivity checks run before the first packet of media.
Relay bandwidth. Every relayed call sends its full audio and video through your TURN servers, and you pay for that traffic.
Operations. TURN needs credentials, regional placement and monitoring. Media servers hold state per call, so scaling them takes more than a round-robin balancer: see load balancing WebRTC sessions across servers.
A media server with a public address makes this easier, because only the user's side is behind a NAT. You still need TURN over TLS on port 443 for corporate networks that block UDP. If your users sit on locked-down networks and you cannot run relays, use a managed WebRTC service. When calls fail to connect, start with the guide to troubleshooting ICE, autoplay and audio failures in WebRTC.
WebSockets have their own network trap: idle proxies close quiet connections. Send ping frames from the server, since browser code cannot send them, or add an application heartbeat. Reconnect with backoff.
When to use WebSocket for realtime AI
Use a WebSocket when both ends are servers, or when the payload is data that must arrive complete.
Server-to-server pipelines. Streaming audio from your agent process to a speech-to-text, text-to-speech or speech-to-speech API. OpenAI's Realtime API guide draws the same line: the session connects over WebRTC in the browser or WebSocket on the server.
Telephony bridges. The caller's audio reaches the provider over the phone network. The provider forwards it to your server over a socket in a fixed telephony format.
Text and control. Partial transcripts, tool calls, "user interrupted" events, avatar state and session lifecycle.
When to use WebRTC for realtime AI
Use WebRTC whenever a person's microphone, speaker or screen is on one end and the exchange has to feel like a conversation.
Browser and mobile voice agents. The user's network is the weakest link, and echo cancellation is required as soon as they are not wearing headphones.
Avatars with lip sync. Video multiplies the bitrate and makes any audio and video drift visible.
Interruptions. Barge-in only feels natural when the user's speech reaches the agent with low, stable delay.
Kiosks and long sessions. A screen in a lobby runs for hours on venue Wi-Fi. Congestion control and ICE restarts keep a call alive through conditions that would stall a socket.
Raw WebRTC or a platform such as LiveKit?
LiveKit, Daily and similar platforms are WebRTC, with the signaling, media servers, TURN and client SDKs already built. Choose raw RTCPeerConnection when you need full control of a one-to-one link and can run the infrastructure. Choose a platform when your agent has to join the call as a participant, which is the normal shape for voice AI. The comparison of LiveKit vs WebSocket for voice and video apps covers when a managed room beats a raw socket.
Avatars follow that shape. Protoface Realtime adds a face to a voice agent, driven by the audio the agent already produces. With the LiveKit plugin, the avatar joins your room as a participant and publishes audio and video, so the browser receives ordinary WebRTC tracks:
The avatar session starts before the agent session, and the plugin then routes the agent's audio to the avatar participant. The Pipecat integration shows the split from the other side. POST /v1/pipecat/sessions returns short-lived WebSocket media credentials for the pipecat-protoface package, which runs in your Pipecat worker. The service then emits synchronized audio and video frames to your pipeline's output transport.
When you do not want to own the transport at all
If the avatar is a contained feature on a website, an embed removes the decision. Protoface hosts the conversation, and the page carries only a public embed ID, no API key. You can use a share link, the <protoface-avatar> element, or your own interface built on protoface-client.
Using both: WebSocket for signaling, WebRTC for media
The standard design uses a WebSocket to set up and steer the call and a peer connection to carry it. MDN's signaling and video calling guide states that WebRTC does not specify a transport for signaling. A WebSocket fits because either side can send at any time, and the guide's own example uses one.
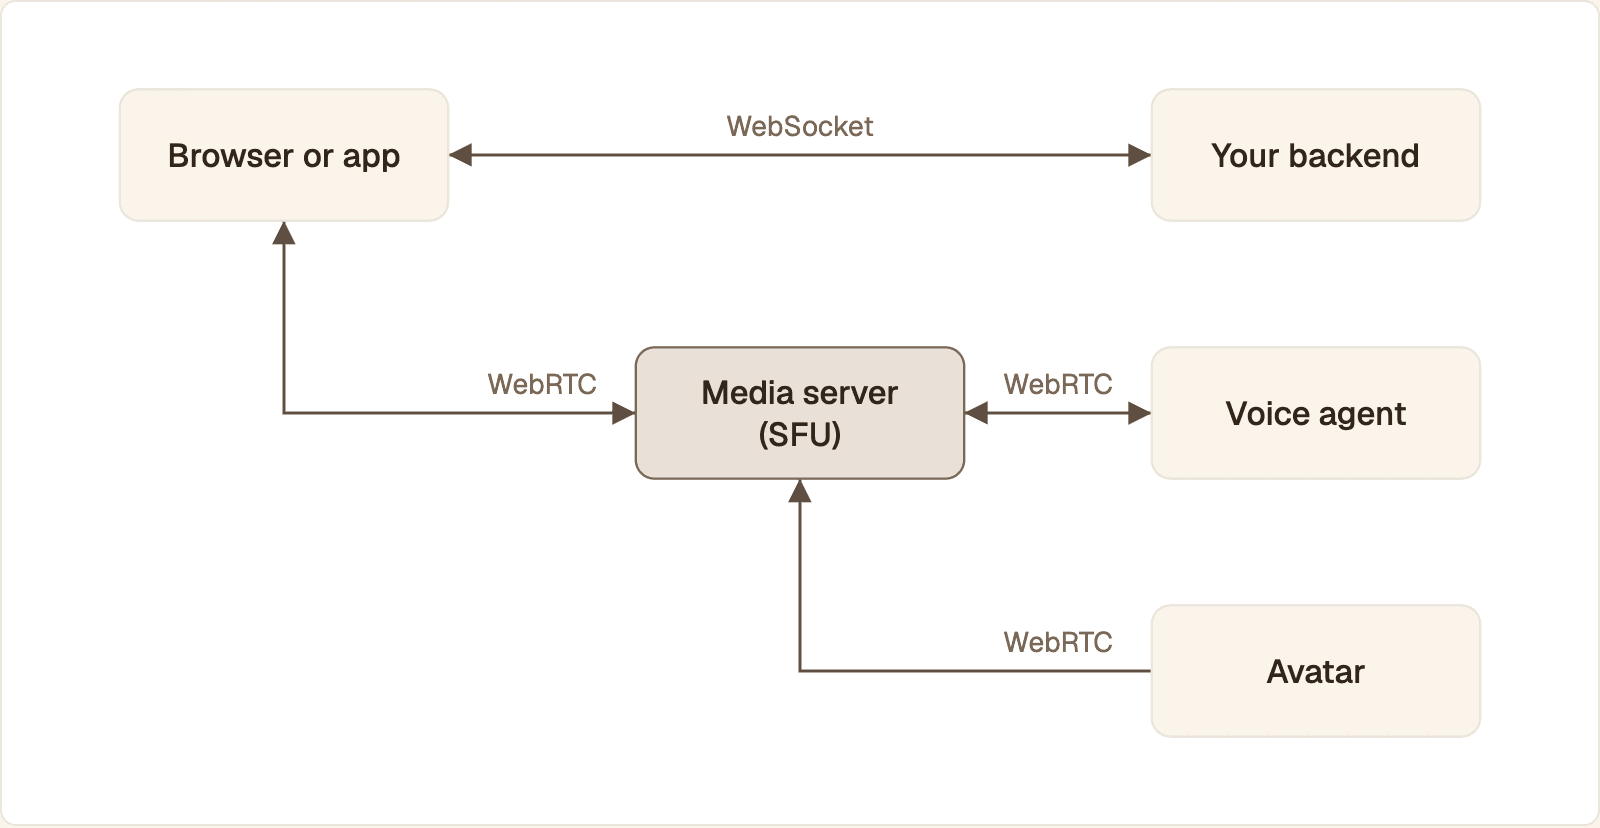
The WebSocket sets up and controls the call. WebRTC carries the media through a media server, where the agent and the avatar join as participants.
The browser opens a WebSocket to your signaling server and authenticates.
The browser creates an offer describing its microphone track and the video it wants to receive, and sends it over the socket.
The server, or the media server behind it, replies with an answer.
Both sides trade ICE candidates over the socket as they are discovered.
ICE picks a working path. Encrypted audio and video now flow over UDP, outside the socket.
The socket stays open for transcripts, state and control. A WebRTC data channel can take over that role if you prefer one connection.
The browser publishes the microphone, asks to receive one video stream, and attaches the remote stream to a <video> element when it arrives. The message names are yours, and the two URLs are placeholders for your own signaling and STUN or TURN servers. The server must answer the offer, then send its candidates in the same format: a candidate added before the answer is set is rejected.
Keep keys off the socket. Authenticate the signaling connection with a short-lived token minted by your backend. Provider API keys and media server secrets stay on the server.
The same choice on your framework or platform
The transport decision does not change with the framework. What changes is where the WebRTC implementation comes from and where you clean it up.
Platform | WebRTC | WebSocket |
|---|---|---|
React, Angular, Vue, SvelteKit, plain HTML | Built into the browser | Built into the browser |
iOS and Android native | A WebRTC library or a platform SDK you bundle | System or common networking libraries |
Unity and game engines | An engine WebRTC package or a platform SDK | A socket client for game state and events |
Python, Node.js, Rust back ends | An agent framework or a server-side WebRTC library | Native or one small dependency |
In a browser framework, keep the connection in a service or store, not in a component. Create it on a user gesture so audio is allowed to play. Close the peer connection and stop the microphone tracks in the teardown hook: ngOnDestroy in Angular, onUnmounted in Vue, onDestroy in Svelte, an effect cleanup in React.
On native mobile, the WebRTC library adds app size and audio session handling that a socket does not. For a server written in Rust, see streaming a realtime avatar with Rust WebRTC.
gRPC streaming and multiplayer games
gRPC streams run on HTTP/2 over TCP, so they share WebSocket's blocking behavior, and browsers cannot call them without a proxy. Use gRPC between services. For games, send fast-changing state over a WebRTC data channel configured as unordered and unreliable, and keep lobby, chat and turn-based messages on a WebSocket.
One rule to keep. If a human hears it or sees it live, send it over WebRTC. If a program reads it, or both ends are servers, a WebSocket is enough.
Common questions
What are the downsides of using WebRTC?
You have to build or buy signaling, run STUN and TURN servers, and debug failures that only appear on other people's networks. Server-side WebRTC is also heavier than a socket, and calls with more than a few parties need a media server.
Is WebRTC still used?
Yes. It ships in every major browser and is the standard way to carry live audio and video on the web. Voice AI has added to its use: OpenAI's Realtime API connects over WebRTC in the browser.
Does ChatGPT use SSE or WebSocket?
OpenAI's API streams text responses over HTTP as server-sent events. Its Realtime API for speech connects over WebRTC in the browser or WebSocket on the server. OpenAI does not document the ChatGPT app's own transport in those guides, so check your browser's network panel if you need to know.
What is replacing WebSockets?
Nothing has replaced them. The closest candidate is WebTransport, which runs over HTTP/3 and offers multiple streams plus unreliable datagrams. MDN lists it as newly available across browsers since March 2026, so keep a WebSocket fallback.
Is WebRTC built on top of WebSockets?
No. WebRTC media travels as encrypted RTP, normally over UDP. A WebSocket is often used beside it to exchange the offer, answer and ICE candidates, but the standard does not require one.
Can I use WebRTC with a Python backend?
Yes. Agent frameworks such as LiveKit Agents and Pipecat are Python and handle the media transport for you, and Python WebRTC libraries exist if you want to terminate a peer connection yourself.
Add a face to the agent you already run
Keep your transport. Protoface Realtime joins your LiveKit room or Pipecat pipeline and turns the agent's audio into live avatar video.